Tuesday, December 23, 2014

~ Easy Hot Cocoa Mix ~

 This may be the easiest hot cocoa mix ever!  Really!


It has only three ingredients.  Powdered milk, sugar, and cocoa.  Simpy mix in  a large bowl, 2 1/2 - 3 cups of powdered milk, 2 cups granulated sugar, and 1 cup plus one tablespoon of baking cocoa.  Mix them together in the bowl, and you can be finished there, or in batches that will fit in your food processor, just pulse for a few seconds, and you'll have a super fine powder that will mix very nicely.  Just add hot water or milk to about 3-4 heaping teaspoons, and you're good to go!  I use about half milk/half water, but you can use any mix or just one or the other to fit your taste.  


Now pack it into a jar to give as a nice and thoughtful gift to a cocoa lover in your life, or for yourself, add a label with mixing instructions and you're done!  Easy!  It took literally about 5 minutes to make one batch of cocoa.  I made three batches in just a few more minutes, and it stores for a long time!  Just like the label says....Enjoy!  :)

Friday, December 5, 2014

~ SIMPLE BIRDSEED SUET CAKES ~

Here's what you'll need for this project:

black oil sunflower seed
saved grease from cooking (bacon fat, hamburger grease, sausage grease, fat from roasts, etc)
waxed paper
knife (for cutting into individual sized cakes)
freezer space

 I really enjoy 'my' backyard birds all during the year.  During the growing season, they don't have much trouble finding food, but winter here is a different story.  The hardiest of the hardiest can manage, but life is tough for a songbird...any bird, or any critter when food is scarce though.  I  like to and enjoy helping them out a bit until the sun is shining and flowers start to bloom again.  So I feed them through the winter, usually black oil sunflower seed and corn.  I have feeders for woodpeckers and suet loving birds (and squirrels) too.  When I have leftover grease from baking, I save it up and use it to make suet cakes.  Here's how I do it, the process is very simple.


I first combine my left over grease and sunflower seeds, the amounts can vary depending on how much fat you have on hand, I had about 1 1/2 cups of fat and added enough sunflower seeds to make a consistency of cookie batter or Rice Krispie treats.  (Now I'm getting hungry!)


People will often try to save some money buying 'wild bird seed', but honestly, the cheaper seed mixes have weed seeds as fillers, and I know many birds eat weed seeds, but these are seeds that they pick through to get to the good stuff.  In other words, those seed mixes put in seeds that most birds don't eat, therefore, they sit on the ground until spring and then most likely will germinate into something you don't want growing in or near your yard.  The black oil sunflower seed runs about $10 for a 10 pound bag,   It can be found cheaper the larger bag that is bought, the price goes down the larger the bag.  I've learned from experience to stick with the minimum of sunflower seeds....every backyard critter from birds to deer love them.  They attract all kinds of birds.


After I've formed my large bird cake on a wax paper lined cookie sheet, I fold over the edges so I get nice firm sides.  This helps when it's time to cut them into cakes.  I place the cookie sheet with the bird cake into the freezer.  Once it's frozen, simply remove and cut into shapes of your choice.  I chose to cut them into 4x4 inch squares since that's the size of my suet feeders, but any size or shape will do, the birds don't discriminate!  Now, being that I don't like to waste anything, I wrapped the suet cakes in the waxed paper that I lined the cookie sheet with!  No waste!  If I were making these for gifts, which you can totally do, any bird lover would like a gift like this, I would have been more careful on cutting and wrapping, but these are for our use, so that wasn't a concern here.   I had a bit left over from cutting and I just placed the bits and pieces into a leftover container from sour cream.  These all go into a plastic or paper bag, and back into the freezer for a cold day.  


 Now on a nice cold day in January ( I can't believe I just wrote 'nice...cold...day...'), but on a nice cold day in January, I'll be able to trudge out to the back yard suet feeders and place a cake or two into the feeders, run back inside, and wait...and enjoy the bird feeding show.  And on the cheap too!  Consider that the cheapest suet cakes I can find that don't contain fillers that the birds don't like costs about $1.40 per cake, these cost a fraction of that, the cost of the seed and waxed paper.  :)  Nice return!!

Monday, October 27, 2014

~ Picture Perfect Pumpkins and Squash ~

I love decorating for the fall holidays.  The colors are so warm and inviting!  I also like to make my pumpkins and squash stretch, so we carve two pumpkins, one each for my kids, and leave the rest as is so they can last longer, even way past Thanksgiving!  We have in years past, turned our fall pumpkins into Santa and snowman pumpkins!  


This past weekend, I had the chance to visit a family farm not far from our farm, but on an out of the way road that ends at their farm!  I haven't been there before, and I have to say, I loved their farm!  My girls were able to pick a pumpkin from a great variety of large selection of pumpkins that unlike large scale commercial farms near here, these pumpkins haven't been climbed over, stepped on, tossed around while looking for 'the one'.  My thought is that these will last longer since they haven't been handled too much.  They were displayed in a very cute barn display, as well as stacked singly on wagons.   We picked up field pumpkins, a hubbard squash, a couple of warty pumpkins, and the orange unknown to me at the moment squash pictured above!


The two little pumpkins in front of this picture are the only two I got from my garden this year!  I"m not sure what happened, but I did plant them in the rain the day before we headed out for vacation this past June, and it rained every day we were gone, plus I could have mulched them better than I did, but I was focused on saving tomatoes and peppers since we have an unusually cool and wet June and July.  I knew by the end of July that I wouldn't have a  pumpkin crop, but I also figured that pumpkins and squash are a whole lot cheaper than tomatoes and peppers!  I also knew there were a handful of farms in our area that I could get pumpkins, so I accepted loss early on and focused on tomato sauce and salsa!  The little ceramic kitty is one that my daughter painted about 8 years ago, and it's has been happy to sit on our porch guarding the front door for a couple of years now.  It's perfect for Halloween!


I just really like these warty pumpkins!!  I'll save seeds from everything I bought this year to plant for next year too.  I've never used Hubbard squash for cooking before, but I'm going to puree this one.  I've read and heard from so many people that the hubbard's make the best pumpkin pie and desserts!!  I can't wait to try it!!  

Wednesday, October 22, 2014

~ A Quick and Almost Free Scary Halloween Tree Decoration ~

 It really is almost free!!  This isn't the end result, I still have a bit of detail work to do, and I need to run to the store to pick up some clear tape!  But this is the idea of the look of the finished product.  I decided a few days ago to try this out, and got around to giving it a try last night.  It turned out so good, and with only about a week before Halloween, I thought I would post this right away in case someone else would be interested in making this.  :)

It starts with a few brown paper grocery bags.  You can use craft paper, but I am a recycler, and I these work great!  For this project you'll need:

* three brown paper grocery bags
* scissors
*a Sharpie pen or any kind of pen or crayon to draw the outlines for your tree and birds
* tape (both to tape the trunk and branches of the tree, plus for hanging)
* a can of black spray paint


I started with cutting the trunk from two grocery bags.  Cut along one edge to the bottom of the bag, cut the other side to the bottom again, and cut through the bottom at the side to make one long piece of paper.  This will give you about 3 to 31/2 feet for the trunk.  For our door, that was plenty big.  Save the scraps from cutting out the trunk!  You can use those for the birds, bats, and pumpkins if you want to add some at the base of your tree!  I googled an image of a Halloween tree to find an image I wanted to work from.  What I chose doesn't look exactly like the tree I ended up with at all, so don't stress about the detail in the google images, use that as a visual only, to get an idea of what you want.  I wanted a trunk that twisted slightly with a hillside and some scary looking branches.  You can see how I taped the pieces to the door as I went along.  It gave me an idea of where to place branches to make sure I got the look I wanted. As you cut the branches from the scraps of paper, just tape them into place.  Don't worry about the color or placement of the tape, it will all be spray painted in the last step.


It's really easy to freehand a branch.  See how it looks kind of weird drawn, but once it's cut and added to the trunk, everything falls into place!


I was happy with this as the 'skeleton' of my tree!  This is why I like taping it where it will hang once completed.  This way you can make sure your finished product will look balanced.  Adding that little hillside at the bottom grounds the tree instead of it looking like it's hanging in mid air.


At this point, tape the seams of the trunk and branches very well so they are secure.


With the scrap paper left over from the trunk and branches, cut out some bats and and owl.  Again, it doesn't look like much on the paper, but once cut out, it looks like a bat!  Also...very important!  You can cut your bat slightly different from the freehand drawing.  Once I started to cut this bat out, I thought I would like some ears to show, so I cut the ears in as I was cutting towards the head simply by cutting them 'outside the lines' so to speak!  


I liked the ears better!  /


I did the same for the owl that's sitting on the top branch of the tree!  My pool little owl looks kind of silly here, but the finished product looks great!  Cut out the eyes so the light can shine through them once a light is turned on at night.  You can add some transparent plastic film in the eyes too if you want them to glow more, either yellow or orange.  One hint to keeping that part cheap and not having to buy extra paper from the craft store is to search out something in your house already that is that color...a potato chip bag, some plastic wrap colored with a highlighter?  Use your imagination and resourcefulness here.  Glow in the dark paint would be a great option too.

  Once your tree looks the way you like, carefully untape it from the door, take it outside to spray paint.  You MUST spray paint outside in a well ventilated area!  I put my tree and birds on the lawn to spray paint.  When the first side was dry, I turned it over to paint the reverse side.  I left it outside to dry and let the fums dissipate.  Spray paint really stinks!!  Once both sides are dry, place your tree and birds in a dry place to make sure the fumes are gone before hanging in place.


This isn't quite done yet, but you get the idea.  I'll post a finished (and much better picture) later today after I get to the store to get some clear tape.  ( I will actually buy some clear packing tape.  Since the holidays are coming, and we send homemade cookies to relatives out of state, I need the packing tape anyway!)

This is a great decoration to make in a short amount of time with very little money involved.  I had to buy the can of spay paint and clear tape.  Everything else, I had on hand.  It's cute, I was able to personalize it to fit my likes, I didn't have to buy a prepackaged decoration so I have saved on packaging and the cost of shipping on a seasonal item, and it's frugal.  The cost of a door sized decoration like this would have easily cost about $10 to $20 dollars!  And did I say it's cute?!?  


Remember to check back for the finished piece in place on my front door!  

Awesome.  Imaginative.  Easy on the pocketbook.  I love it!!  :)

Thursday, August 21, 2014

~ Homemade Pierogies...and Baked Potato Skins ~

 Homemade Pierogies.  It sounds like it can take all day, but with a bit of organization, or simply having made them a few times, it really doesn't.  It does take longer than opening up of box of frozen ones, but the result of homemade pierogies can't be beat.  I got my recipe here: http://pittsburgh.about.com/od/recipes/r/pierogies.htm.  You can use the recipe as it's written, or as I often do, change things up a bit.  I like to use baked potatoes since I can use the hollowed out potato skins to make baked potato skins in addition to the pierogies. I also don't add onion to the potato mixture.  I love that this recipe uses sour cream in the dough, somehow the sour cream gives tenderness to the finished product.  I have a lady lock recipe that uses sour cream in the dough, and they are so good, better than good, but that's another post for another day!  So here's how to make a great pierogi. 

I start out by baking some potatoes in the oven just as I would for baked potatoes.  Pierce the skins in a few places, about five or six spots so steam can vent and the potatoes don't explode in the oven!  I baked about eight medium to large sized potatoes, and placed them directly on the rack so the skins could crisp up a bit.  When they are cooked, I sliced them in half lengthwise to cool faster.  Save the skins!  What I like about baking the potato vs. boiling is that there is no waste here, I use the potato skins to make potato skins!


 Simply scoop out the potatoes into a medium to large sized bowl.


Add whatever kind of shredded cheese you like to the potatoes, I used colby-jack, about 4 oz.  At this point, I also add about 2 tablespoons of butter and 1-2 teaspoons of milk.  It just makes the mixture a bit more creamy.  I also don't add onion to this mixture, I add onion to the pan during the last step of cooking.
Mix everything together until nice and smooth.  Actually, I like some lumps in the potatoes, it's a matter of personal preference.   I use a fork or slotted spoon, but this can be done with an electric mixer too, I just like to minimize clean up!


Now just roll out the dough from the recipe above.  I did roll it thinner than 1/8th inch, this dough has a good bit of elasticity, so the dough stretches a bit to seal in the filling.  Cut circles with the edge of a glass or cookie cutter.  I used a large drinking glass, a mason jar would do the job too. 


Place about 1-2 teaspoons of potato/cheese filling to the center of the circle and fold the dough to form a half circle.  Seal the edges with a fork.  If the dough is dry and the edges aren't sealing, simply brush a small amount of water to the edge and seal with the fork again.  You want a good seal so that the potato filling doesn't leak out while cooking.


At this point, I change the recipe from above a bit again.  While I'm forming the pierogies, I add one onion, (I like sweet onions) , to a large cast iron skillet with 1- 2 tablespoons of butter and saute until the onions caramelize and get a nice brown color.  Again, this is a matter of preference, I like the onions cooked a bit more.  Add the pierogies directly to the pan and add about 1/2 cup of water, more can be added if it all cooks off before they are done.  It only takes a couple of minutes each side to cook the pasta and warm the filling.  At the very end, as the water is cooked out of the pan, I add just a bit, maybe a tablespoon of butter to finish off and give a nice flavor.  Not much is needed, and you don't have to add any, it just finishes off the pierogies nicely without making them greasy.  Basically, I cook the pierogies with the water instead of a lot of butter or oil, the pierogies turn out nice and tender, then I add the butter for flavor.


This is the finished product!  Whenever we have a starchy meal, I balance it out with a green vegetable.  This is a trick my mom taught me as a young girl.  It adds veggies to the plate, and the green and in this case, red of the tomatoes makes the meal look appetizing.  A fresh simple salad from the garden to compliment these pierogies...nothing better.  It was delicious, my kids were very quiet at the table, no bickering or complaining, because they were too busy eating!  :)  

These can also be made but not cooked and frozen for later use.  If you choose to make extra for a future meal, simply freeze on a cookie sheet single layer, then place in a tightly sealed ziploc bag, and freeze. 


Now to the hollowed out potato skins from the start of the recipe, I simply add any leftover potato filling, some shredded cheese and carmelized onion and bake for about 5-7 minutes at 375 degrees F, until the cheese has melted.  Add to this any topping you like.  I like just a simple salsa to the top, but you can add sour cream, bacon pieces, taco toppings...really, whatever you like!  Enjoy!!

So, by baking the potatoes instead of boiling, and mixing everything by hand, I save a lot of time on clean up!  I hate clean up!  If I can minimize pans used to prepare a recipe, I'm all for it, and there is very little waste or waste from packaging from this recipe.  One of these days, I'll learn to make my own cheese, to minizmize waste from packaging even more!  This is a great home cooked dinner, that doesn't take as much time as you might think, and it fills the belly.  :)

Friday, July 25, 2014

~ Blueberry - Basil Vinegar ~


 I see at the grocery stores all of the time gourmet salad dressings that are 'some sort of fruit vinaigrette'.  They are typically more expensive, and since I've had a decent amount of blueberries this year, and I want to simplify and cut back on what I buy and what I put in the recycling bin, I thought I would give this vinegar a try.  It can be added to oil, garlic, dijon mustard and basil any time to make a nice salad dressing or glaze for meats.

So here is the process:  I followed the recipe from Ball's Complete Book of Home Preserving.


I added 4 cups of fresh blueberries with 1 cup of white wine vinegar to a glass container with a fitted lid.  This is very important since this will take up to 4 weeks to make!  Just crush the berries.  The recipe said lightly, I may have crushed them a bit more, but still looking pretty intact.


I picked about 1 cup of fresh basil, and tore the leaves, then crushed them to release the oils in the leaves.  I have a few varieties growing, I used a bit of each.  It smells really good!  Ball recommends using a mortar and pestle to crush the leaves. I don't have one yet, so I used a ceramic bowl and the back of our ice cream scoop.  The idea is just to crush the leaves, it doesn't have to be fancy.


Next, I added the crushed basil leaves and the zest of a lemon to the blueberry/vinegar mixture along with 3 more cups of white vinegar.


This is what it will look like once everything is mixed up.  It doesn't look great, but it will start to brew!  I have it sitting on the back of my kitchen counter with the lid firmly attached and a dark towel covering everything.  It needs a cool, dark environment to blend the flavors without spoiling.  The back of my countertop is under a corner cabinet and is pretty dark back there, so I figure I'll remember to stir it every two to three days as the recipe recommends. I can't wait to try this.  After it's the strength I like, I'll strain and can the vinegar to keep for future use.  I really can't wait!

I've wanted to do something like this for years, but have always been hesitant to use 4 cups of precious blueberries which I'll later discard.  I have enough already frozen this year, and have decided to focus on freezing for muffins, cakes, and pancakes, instead of jellies.  I'm going to try my hand at grape jelly later this summer, and elderberry, my all time favorite, so making this blueberry-basil vinegar seems like an adventurous idea!  It will take up to 4 weeks, so this will be an exercise of patience!  I'll keep you posted!

Here's the recipe:  (It's on page #276 if you already have this book!)

 ~ Blueberry - Basil Vinegar ~

4 cups blueberries
4 cups white wine vinegar, divided
1 cup loosely packed basil leaves, crushed
Grated zest of 1 lemon

In a large glass bowl, combine blueberries and 1 cup of white wine vinegar. Lightly crush the blueberries with a potato masher.  Add the remaining 3 cups of vinegar, crushed basil and lemon zest, and stir to combine. Cover tightly with plastic wrap and let stand in a dark, cool place, ideally 70 to 75 degrees F. for up to 4 weeks, stirring every 2 to 3 days.  Taste weekly until the desired strength is achieved.

After the desired strength is achieved, prepare canner, jars and lids.

Line a strainer with several layers of cheesecloth and place over a large stainless steel saucepan.  Strain vinegar without squeezing the cheesecloth. Discard cheesecloth and residue.  Place saucepan over medium high heat to heat vinegar to 180 degrees F.

Ladle hot vinegar into hot jars, leave 1/4 inch headspace.  Wipe rim and center lids on jars.  Screw the bands down until resistance is met, increasing to fingertip tight.

Place jars in canner making sure they are completely covered with water.  Bring to a boil and process for 10 minutes.  Remove canner lid and let sit for 5 minutes, then remove jars, cool and store.

Variation:  If you wish to keep fresh whole blueberries in the vinegar, add 1/4 cup fresh blueberries to the mixture before ladling into jars.


Tuesday, July 22, 2014

~ Zucchini Fries ~


I grew up eating fried zucchini, but we were at the grocery store a few weeks ago, and they had samples of zucchini fries.  My daughter loved them and begged for me to buy some.  I reminded her that our garden zucchini would be ready to harvest soon, and we would try our own hand at making them.  The results were very good...two thumbs up from my daughter.


 It started with this little guy.  Well, really this squash is about the size of my hand and oddly shaped.  We had a good bit of drier weather and it formed more like a large lemon.  It's a cross with most likely a Cozelle Zucchini and a pumpkin.  I wasn't sure how it would taste, so I decided to cut it open tonight and see what was inside.


I'm pretty sure it's crossed with a pumpkin.  It was heavy for it's size and the seeds were pretty large and dense for a zucchini.  It tasted wonderful, a nice sweet and firm flesh.


I decided to scoop out the seeds with a spoon and cut it into wedges at first, then I got the idea to give zucchini fries a try.  I cut them about the size of a larger steak fry you would get at a restaurant, but you can really cut them any size or shape you like.


We mixed up an egg wash of two eggs and about 1/4 cup of milk  My daughter was around, so she was happy to help with this.


We dipped them first in a breading mix of about 1 cup of seasoned bread crumbs, 1/2 cup flour and 1/2 cup cornmeal.  I'm guessing at these proportions since we measured in 'handfuls', thinking one handful was about 1/2 cup.  So, starting with the freshly cut zucchini, we dipped in the bread crumbs, the egg wash and then again the bread crumbs to get a nice coating that would stick to the zucchini.  A friend of mine told me a few years ago that she adds corn meal to her fried green tomatoes to give a little extra 'crisp'.  It did the same for these fries!  No extra salt is needed, the breadcrumbs have plenty of flavor, and the marinara sauce for dipping has great flavor too!


We heated a cast iron skillet with vegetable oil, I think we used canola to cover the bottom of the pan, and let the oil get hot, then place the zucchini fries in the pan and let them cook about a minute on each side.  These cook up pretty quickly, and that nice golden brown color is what you are looking for.


I should have snapped a photo of the finished fries before I let them take them to the table!  Once they were there, it was pure eating!  We served them with a side of warmed marinara sauce.   We make our own sauce, so this part of the meal was largely from our garden!


When I was a kid, my mom would fry up the left over breading like hush puppies for us kids to eat.  It was a rare 'treat' but we loved it.  Our leftover batter tonight was mostly breading, so I cooked it up as a treat for our dogs.  They loved them!

So there you have it...one more delicious and fun use for all of your zucchini abundance.  Enjoy!!

~ How I Garden Organically ~ :)

 To garden naturally, without use of synthetic pesticides or herbicides, I guess is how to describe organic gardening.  For me, it has simply been how I have always gardened.  Both of my parents gardened, and did so organically their entire lives, for my mom, it was simply the love of gardening, for my dad, especially in his younger years, it was for food...mainly potatoes!  Both loved and appreciated the taste of fresh, clean food.  As a kid in the '70's, we were the only family in the neighborhood to have a compost pile, huge garden, pigs, and occasionally a sheep to cut grass in the summer and food for the winter, and this is before we moved to our farm!  Now, I start my own seeds.  It takes a bit of extra work, but the end result is plants that perform better than the nursery plants I see and have bought to fill in over the years with plants I lost in early spring.  I have found that replanting is better than buying a transplant because my tiny transplants I started from seed, even later in the planting season, have outperformed the nursery plants.  It's happened time and time again, so I no longer feel the pressure to stop at the nursery to buy tomato or pepper plants I lost to frost.

Here are some pictures of my garden this year.  So far, so good!

Volunteer Roma tomato growing in my garden.

VOLUNTEERS!  They might be my favorite plants!  The Roma tomato above sprouted up in my sugar podded peas row, and as with volunteer plants, I decided to leave it.  I find that volunteers in general, grow better than the plants I grow from seed and transplant and baby for a couple of months before they head to the garden. This plant, right now, is about 3 x 4 ft. in width, and loaded with tomatoes!

Johnny Jump Ups, or Violas, have intense color to brighten up any space.

Sometimes plants have a funny start.  I had a packet of Johnny Jump Ups I bought a couple of years ago from Seed Savers Exchange and forgot to plant (we all do that, don't we?).  After nothing came up after about two weeks, I replanted some habanero pepper seed I saved from the garden last year.  About four or five of the Johnny Jump Ups came up with the peppers, so I planted them in the garden among them.  They are growing great!  So are my hubby's habanero's. Also, I like to dot my garden with flowers.  They look pretty, plus are good for the bees, wasps, and butterflies that visit the garden. Johnny Jump Ups, or Violas, often come back year after year, a bright and happy little plant.

Young bush beans.

 Earlier in the season, I planted my favorite, sugar podded peas.  I followed with these bush bean mix from Botanical Interests.  This is a snapshot from a few weeks ago.  I've had the same problem with both the peas and beans at the farm garden this year: some critter LOVES the young leaves and the flower blossoms, and has eaten every single one!  My fault for not getting marigolds planted in there sooner, but I found a solution for both crops, which has worked for the peas and now working for the bush beans:  floating row covers!

This is how I keep groundhogs, rabbits, and deer from eating the blossoms off of my bush beans.
 No need for traps, or buying something expensive to combat the groundhogs, rabbits and deer here.  Covering the entire row (s) and simply anchoring with a rock or fallen tree branch here and there has stopped the attack!  I don't know if they are scared of the row cover, or the simple barrier is enough for them to seek snacks elsewhere, but it works, my beans are full of flowers now!  This double row is a mix of three different gourmet filet beans.  I can't wait.  :)  Also, it may not be the prettiest, but newspaper, black plastic, which I save and use year to year, pulled weeds and cardboard boxes are great mulch!!  A gardeners best friend is mulch, and all is reused materials.  I hold down the newspaper with bricks and rocks, no short supply of those around here since my dad was a bricklayer, and southwest PA is full of fieldstone!  I add pulled weeds and grass clippings over the newspaper as the season progresses, and then I can remove the rocks as needed.  I always find that I have to prop something up or hold something down, so I pile them into a very visible pile at the end of the rows when I don't need them because it stinks to trip over a random rock into crops I've worked hard to grow, and these aren't something that I want getting caught up in the tiller or mower, so keeping them visible as plants grow is very important.

My sweet peppers just starting to flower.
Peppers!  I grow several varieties sweet and hot, not only for fresh eating out of the garden, but we make our own salsa, and about 1/3 of our salsa ingredients are peppers!  I also freeze whole or halved peppers for stuffed peppers in the winter, and dehydrate the colorful peppers into strips and store them in a canning jar, they add great color to stir fries and enchiladas without out paying an outrageous price for colored peppers, and by doing this, I know the food going on my table throughout the year.

Colorful Beet Mix from Seed Savers Exchange.  
Beets!  I don't really care for the taste of beets, although I am determined to make myself like them, and I do like the golden beets roasted and I like the young beet tops in salads.  But beets are probably one of the easiest and prettiest crops to grow in the garden!  The colors of the foliage is intense!  It's so gorgeous, nothing really bothers them, other than weeds, and I have some friends that do love both fresh and pickled beets, so it's something I'm happy to grow and share!  I think sharing the bounty of the garden is important, since gardening feels more like a community event to me.  People will always talk and ask about my garden. I like that, and always hope the taste of pure, fresh food from the ground, not a grocery store shelf, will encourage others to start their own gardens.

Volunteer tomatillo's.
Last year, I planted tomatillo's for the first time, my hubby saw a salsa recipe with tomatillo's, and said he would like to try it.  I had already price tomatillo's in the grocery store, and the price was outrageous, and they seemed to sit there for a long period of time, since not too many people use tomatillo's in Pennsylvania on a regular basis, so I suggested he wait for the salsa and I would grow them in the garden.  I planned on planting the purple tomatillo's this year, but time is always short, and by the time I got around to planting them, I thought it was too late.  I was wrong.  These came up in my garden as volunteers.  I'm pretty sure I pulled the first round of them that sprouted because I had weeded this area sometime in early June.  Long of the short, we went on vacation, and when we got back and I got to weeding this area again, what do I see?  Yellow tomatillo's coming up in force!  This picture again is from a couple of weeks ago, they now are starting to flower!  Someone had told me they self seed, and they sure do!!  This is an heirloom variety, so they will be true, we will have yellow tomatillo's again this year!  Hint, hint...tomatillo salsa makes a wonderful green sauce for chile rellano's or enchilada's!

One of many volunteer squash from last year.
Have I said I love volunteers?  Well, here's another!  I had many volunteers sprout this spring.  This one in particular was in my front flowerbed.  I kept some there, and am harvesting regular Cozelle zucchini right now, but I also took some out and transplanted them into my farm garden.  This one, taken from near where the Cozelle's are growing, is a smaller, bright green globe shaped squash.  I love happy surprises.  The color of this little guy is so intense, and it should be ready to harvest in a few days.  I  can't wait~

Habanero Peppers saved from seed growing nicely in my garden.

The great thing about these habanero's is that they are from saved seed.  Well, I actually didn't save the seed...in the early spring, I noticed many intact peppers atop the black plastic in the garden.  They were paper thin, maybe thinner by March, but intact.  I could see the pepper seeds inside, and they were right where I planted the habanero's  last year, so I knew they couldn't be anything else.  On a whim, I picked some of them up and took them home to see if they would grow.  They did, and with great germination too, one pepper yielded about 48 seedlings!  Hot peppers, just like the sweet, take awhile to take off here, they need the heat to grow.  They looked pretty scrawny for awhile, and even in this picture, still a bit small, but the summer heat is their friend!  These same peppers taken a couple of weeks ago, are about twice the size now.

Colorful beets and Cozelle zucchini from the garden.
June in the garden here, harvesting amounts to root crops and summer squash mainly. Other crops are taking off to grow, and are heavy with fruit for an August harvest. Lettuces and herbs too.  I plant lettuces and leafy crops in a shaded area of the garden which is cooler, so I don't have as much bolting going on in the summer heat.

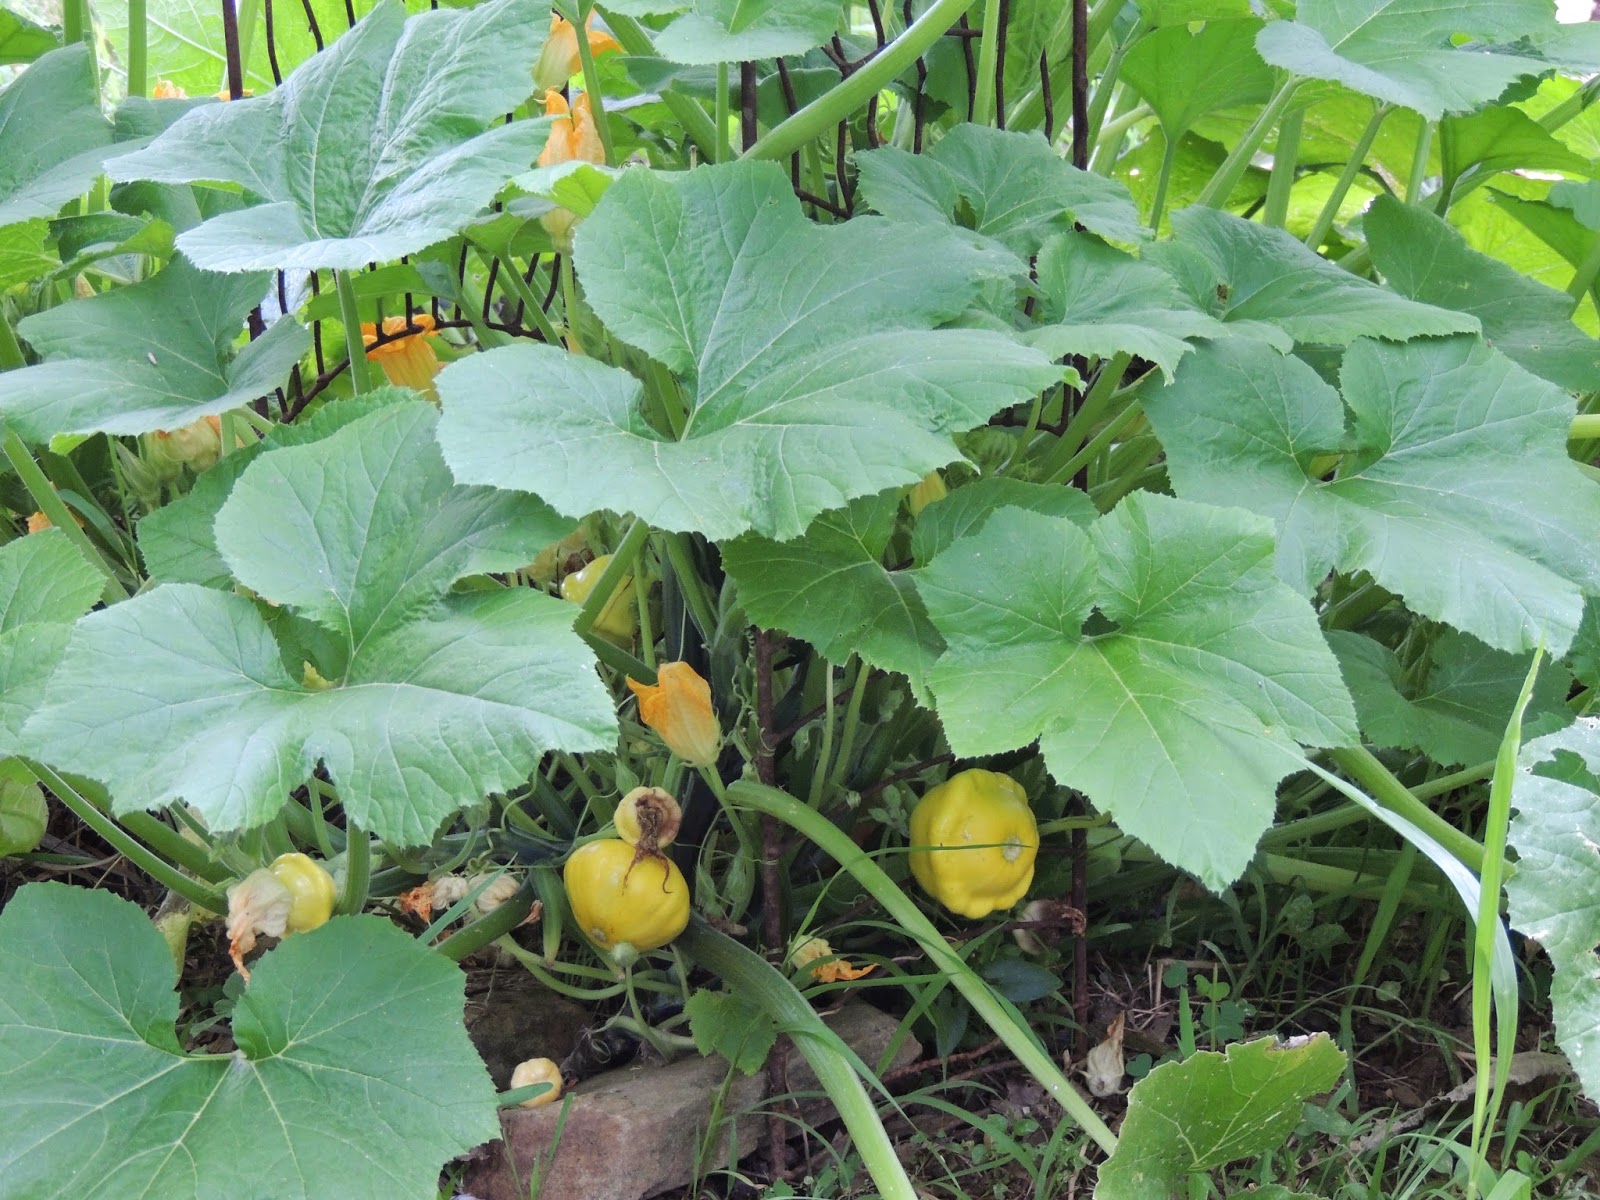
Volunteer Yellow Bush squash.
My kids have their own raised beds in the garden.  Last year, my middle daughter had a wonderful green squash, a zucchini/pumpkin cross, that was the most wonderful squash we've ever eaten.  This year, my youngest daughter has a volunteer Yellow Bush patty pan squash growing.  I picked four beautiful squashes off this plant yesterday evening.  They are so pretty, and my daughter loves the patty pans, so I'm happy that it decided to grow in her garden!  Both of my daughters also grow cantaloupe and cukes,  plus the youngest is growing cabbage for a fall crop.

Yellow apples growing on a tree in the side yard.
One huge surprise for me this year!  These apples are growing on a tree in an area of the side yard from an old orchard that was planted in an area that was really to wet for apple trees.  Over the years, they have all died out, but somehow, this has survived.  I thought last year it was dead, but I looked down in that area a few weeks ago to see this...apples!  We have several apple trees up on  the top of the hill on the treeline, some very old, some my mom planted 35 years ago, so I guess even those trees are old, but somehow, this tree pollinated!  The closest trees are on the other side of the farmhouse, and on top of the hill, the closest being about 100 ft. away!  I"m happy, I have a blueberry jam recipe that calls for tart apples to thicken the jam, so I think these will be perfect.  Last year, I made several pints of applesauce from the apples up on the hill.  It was so delicious, I can't believe I didn't make applesauce years ago!  I guess with the kids being younger, and me thinking applesauce was more complicated that it was, it was something I didn't tackle!  Fact is, applesauce is one of the easiest things to make and can for the winter!  So easy!  I have always canned tomatoes, and that does take up a bit of time, but applesauce is so easy, it's no problem fitting that into the schedule.

I mentioned blueberry jam.  So many years ago, 35 years ago, maybe more, my mom planted blueberries in the other side yard opposite the apple tree orchard.  She planted early, mid season, and late variety blueberries so as to get a longer crop.  Well, about eight of those plants are still alive and fruiting!  I have gotten a very good blueberry crop this year, have made muffins, coffee cakes, blueberry pancakes, frozen a bunch, and plan to make some blueberry jam with a bunch I picked last week and this week.  These plants are in severe need of pruning, I think I will prune half the bush so I still get fruit next year, and then follow with the next half next year. A few of the bushes look terrible, but they have leaf growth, so those I'll probably give a harder pruning.  Of the eight plants, five are still fruiting nicely!  Not bad for very old bushes!!

My tomatoes are going strong, as well as my Big Max pumpkins have pumpkins forming, my pole beans are starting to take off, I'm planting a fall crop of lettuces, peas, beans, cabbage, Brussels Sprouts, kohlrabi, and flowering cabbage, just to keep things pretty!  Mulch is my best friend.  Keeping ahead of weeds makes for healthier plants, which makes the plants be able to resist attacks of fungus or bugs.  I still fight with slugs and cabbage worms, and as I've said, floating row covers are working great for me. They may not look so great as people glance from the road into my garden, but the end result is getting a nice healthy crop.  I don't mind sharing some of my crop with the critters, that's just nature, but they tend to be rude dinner guests and eat everything in sight!  Next order of business...teach the critters some manners!!  :)

Do you have any gardening questions?  I have gardened my entire life, and have found solutions to keep from having to use chemical fixes.  Nature takes care of nature.  If you are patient and committed, there is always an answer in nature, and often closer than you think!


Wednesday, July 16, 2014

The Lettuce Project: ~ Another Way to Use Tuna....Tuna Cakes ~

The Lettuce Project: ~ Another Way to Use Tuna....Tuna Cakes ~: My brother gave me a huge restaurant sized package of tuna that he bought in bulk  I was happy to take it, my family really likes tuna, but...

~ Our Incredible and Super Cool Air Tent ~

 When I was a kid, I grew up in a large old farmhouse that didn't have air conditioning.  It was all fan power to keep cool in the summertime!  We were inventive kids and would make 'air tents' by draping a light bedsheet over top of the box fans and weighting them down with anything we could find to be sure our 'roof' didn't fly off!  It was actually a happy and fun childhood memory which I passed down to my kids a few years ago.  We have central air in our house, but honestly, I try to use it as little as possible.  They have perfected the art of building an air tent.


Whereas I used rocks, cups, knick knacks or whatever I could find around the house as a kid to weigh down my tent, my daughter came up with the ingenious idea of tying the center of a twin sized top sheet around the handle on our box fan.  Why did I never think of that for all of those years?!?  Anyway, good thinking!  She made an afternoon out of this, so she brought in the raspberry air freshener she bought for her room.  She built this in the corner of the room next to the couch, a corner curio, and a side chair.  Perfect placement, perfect construction!


She even supplied snacks while we hung out in there!  Lemonade, raisins, peanuts, and homemade granola bars and chocolate chip cookies. She also had a pitcher of water behind the chair along with the drinking cups.


 I gladly crawled in to hang out, but Dad didn't want to, so he asked my other daughter for a cookie.  She reached her hand in for the handoff.


The handoff of two chocolate chip cookies!


Our pets had to check it out too. Max, our lab/collie/shepherd mix was the only one to come all the way in and stay for awhile.  He's about 50 lbs. but thinks he's a lap dog~


Our kitty cat Emma came in but swiftly went back out.  I guess the fans made too much noise.  We were afraid that afterward she would jump onto the top of the air tent and come crashing down, claws open and all, but she didn't.  Thank goodness!


Our German Shepherd Megan, came to investigate, but decided to hang out outside instead.  She's probably too big to get in there with us anyway!   She's a good girl.


This is the ingeniousness of tying the center long end of the bed sheet to the fan handle.  There is no flying off of bed sheets, or being clunked with some heavy object that would have otherwise weighed down the tent!  And this picture is taken in 3-D...a function I didn't know existed on my camera until a couple of days ago!

Anyway, go and make an air tent and gather some snacks or a magazine or book and spend a bit of time just relaxing.  You'll be glad you did...time slows down a bit in an air tent!