To garden naturally, without use of synthetic pesticides or herbicides, I guess is how to describe organic gardening. For me, it has simply been how I have always gardened. Both of my parents gardened, and did so organically their entire lives, for my mom, it was simply the love of gardening, for my dad, especially in his younger years, it was for food...mainly potatoes! Both loved and appreciated the taste of fresh, clean food. As a kid in the '70's, we were the only family in the neighborhood to have a compost pile, huge garden, pigs, and occasionally a sheep to cut grass in the summer and food for the winter, and this is before we moved to our farm! Now, I start my own seeds. It takes a bit of extra work, but the end result is plants that perform better than the nursery plants I see and have bought to fill in over the years with plants I lost in early spring. I have found that replanting is better than buying a transplant because my tiny transplants I started from seed, even later in the planting season, have outperformed the nursery plants. It's happened time and time again, so I no longer feel the pressure to stop at the nursery to buy tomato or pepper plants I lost to frost.
Here are some pictures of my garden this year. So far, so good!
 |
| Volunteer Roma tomato growing in my garden. |
VOLUNTEERS! They might be my favorite plants! The Roma tomato above sprouted up in my sugar podded peas row, and as with volunteer plants, I decided to leave it. I find that volunteers in general, grow better than the plants I grow from seed and transplant and baby for a couple of months before they head to the garden. This plant, right now, is about 3 x 4 ft. in width, and loaded with tomatoes!
 |
| Johnny Jump Ups, or Violas, have intense color to brighten up any space. |
Sometimes plants have a funny start. I had a packet of Johnny Jump Ups I bought a couple of years ago from Seed Savers Exchange and forgot to plant (we all do that, don't we?). After nothing came up after about two weeks, I replanted some habanero pepper seed I saved from the garden last year. About four or five of the Johnny Jump Ups came up with the peppers, so I planted them in the garden among them. They are growing great! So are my hubby's habanero's. Also, I like to dot my garden with flowers. They look pretty, plus are good for the bees, wasps, and butterflies that visit the garden. Johnny Jump Ups, or Violas, often come back year after year, a bright and happy little plant.
 |
| Young bush beans. |
Earlier in the season, I planted my favorite, sugar podded peas. I followed with these bush bean mix from Botanical Interests. This is a snapshot from a few weeks ago. I've had the same problem with both the peas and beans at the farm garden this year: some critter LOVES the young leaves and the flower blossoms, and has eaten every single one! My fault for not getting marigolds planted in there sooner, but I found a solution for both crops, which has worked for the peas and now working for the bush beans: floating row covers!
 |
| This is how I keep groundhogs, rabbits, and deer from eating the blossoms off of my bush beans. |
No need for traps, or buying something expensive to combat the groundhogs, rabbits and deer here. Covering the entire row (s) and simply anchoring with a rock or fallen tree branch here and there has stopped the attack! I don't know if they are scared of the row cover, or the simple barrier is enough for them to seek snacks elsewhere, but it works, my beans are full of flowers now! This double row is a mix of three different gourmet filet beans. I can't wait. :) Also, it may not be the prettiest, but newspaper, black plastic, which I save and use year to year, pulled weeds and cardboard boxes are great mulch!! A gardeners best friend is mulch, and all is reused materials. I hold down the newspaper with bricks and rocks, no short supply of those around here since my dad was a bricklayer, and southwest PA is full of fieldstone! I add pulled weeds and grass clippings over the newspaper as the season progresses, and then I can remove the rocks as needed. I always find that I have to prop something up or hold something down, so I pile them into a very visible pile at the end of the rows when I don't need them because it stinks to trip over a random rock into crops I've worked hard to grow, and these aren't something that I want getting caught up in the tiller or mower, so keeping them visible as plants grow is very important.
 |
| My sweet peppers just starting to flower. |
Peppers! I grow several varieties sweet and hot, not only for fresh eating out of the garden, but we make our own salsa, and about 1/3 of our salsa ingredients are peppers! I also freeze whole or halved peppers for stuffed peppers in the winter, and dehydrate the colorful peppers into strips and store them in a canning jar, they add great color to stir fries and enchiladas without out paying an outrageous price for colored peppers, and by doing this, I know the food going on my table throughout the year.
 |
| Colorful Beet Mix from Seed Savers Exchange. |
Beets! I don't really care for the taste of beets, although I am determined to make myself like them, and I do like the golden beets roasted and I like the young beet tops in salads. But beets are probably one of the easiest and prettiest crops to grow in the garden! The colors of the foliage is intense! It's so gorgeous, nothing really bothers them, other than weeds, and I have some friends that do love both fresh and pickled beets, so it's something I'm happy to grow and share! I think sharing the bounty of the garden is important, since gardening feels more like a community event to me. People will always talk and ask about my garden. I like that, and always hope the taste of pure, fresh food from the ground, not a grocery store shelf, will encourage others to start their own gardens.
 |
| Volunteer tomatillo's. |
Last year, I planted tomatillo's for the first time, my hubby saw a salsa recipe with tomatillo's, and said he would like to try it. I had already price tomatillo's in the grocery store, and the price was outrageous, and they seemed to sit there for a long period of time, since not too many people use tomatillo's in Pennsylvania on a regular basis, so I suggested he wait for the salsa and I would grow them in the garden. I planned on planting the purple tomatillo's this year, but time is always short, and by the time I got around to planting them, I thought it was too late. I was wrong. These came up in my garden as volunteers. I'm pretty sure I pulled the first round of them that sprouted because I had weeded this area sometime in early June. Long of the short, we went on vacation, and when we got back and I got to weeding this area again, what do I see? Yellow tomatillo's coming up in force! This picture again is from a couple of weeks ago, they now are starting to flower! Someone had told me they self seed, and they sure do!! This is an heirloom variety, so they will be true, we will have yellow tomatillo's again this year! Hint, hint...tomatillo salsa makes a wonderful green sauce for chile rellano's or enchilada's!
 |
| One of many volunteer squash from last year. |
Have I said I love volunteers? Well, here's another! I had many volunteers sprout this spring. This one in particular was in my front flowerbed. I kept some there, and am harvesting regular Cozelle zucchini right now, but I also took some out and transplanted them into my farm garden. This one, taken from near where the Cozelle's are growing, is a smaller, bright green globe shaped squash. I love happy surprises. The color of this little guy is so intense, and it should be ready to harvest in a few days. I can't wait~
 |
| Habanero Peppers saved from seed growing nicely in my garden. |
The great thing about these habanero's is that they are from saved seed. Well, I actually didn't save the seed...in the early spring, I noticed many intact peppers atop the black plastic in the garden. They were paper thin, maybe thinner by March, but intact. I could see the pepper seeds inside, and they were right where I planted the habanero's last year, so I knew they couldn't be anything else. On a whim, I picked some of them up and took them home to see if they would grow. They did, and with great germination too, one pepper yielded about 48 seedlings! Hot peppers, just like the sweet, take awhile to take off here, they need the heat to grow. They looked pretty scrawny for awhile, and even in this picture, still a bit small, but the summer heat is their friend! These same peppers taken a couple of weeks ago, are about twice the size now.
 |
| Colorful beets and Cozelle zucchini from the garden. |
June in the garden here, harvesting amounts to root crops and summer squash mainly. Other crops are taking off to grow, and are heavy with fruit for an August harvest. Lettuces and herbs too. I plant lettuces and leafy crops in a shaded area of the garden which is cooler, so I don't have as much bolting going on in the summer heat.
 |
| Volunteer Yellow Bush squash. |
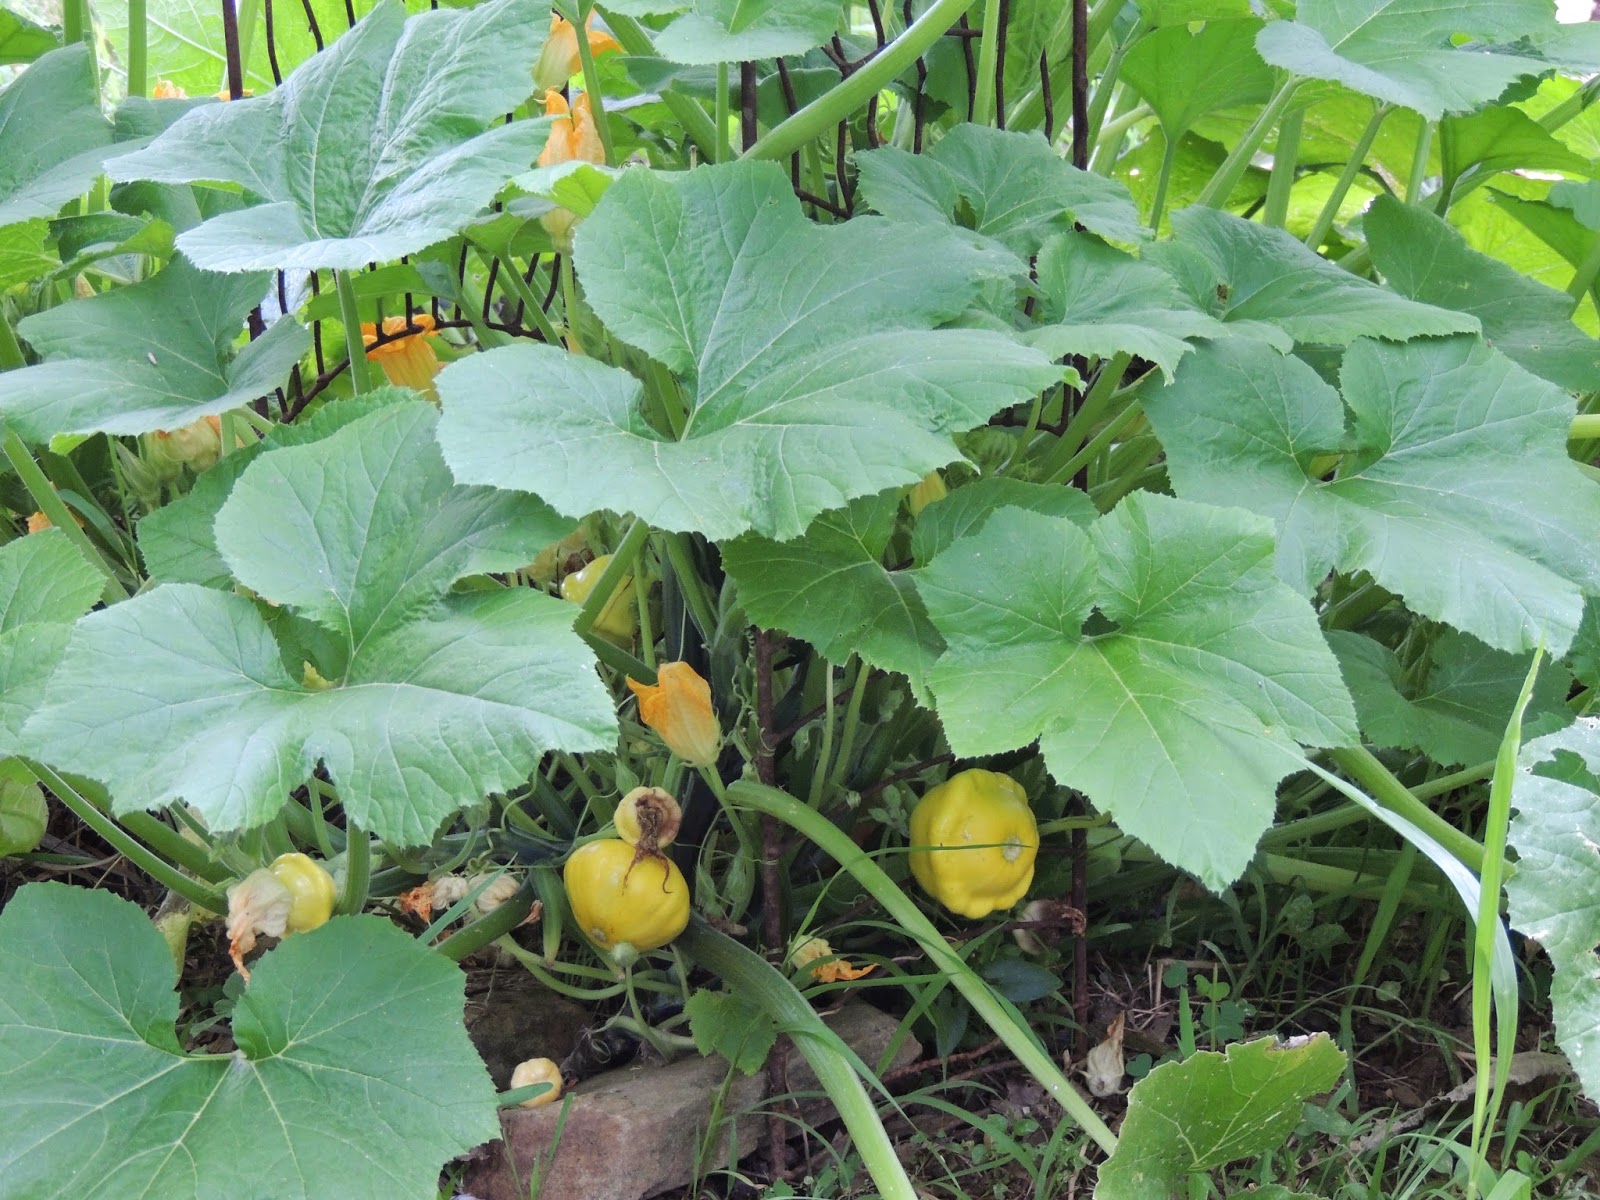
My kids have their own raised beds in the garden. Last year, my middle daughter had a wonderful green squash, a zucchini/pumpkin cross, that was the most wonderful squash we've ever eaten. This year, my youngest daughter has a volunteer Yellow Bush patty pan squash growing. I picked four beautiful squashes off this plant yesterday evening. They are so pretty, and my daughter loves the patty pans, so I'm happy that it decided to grow in her garden! Both of my daughters also grow cantaloupe and cukes, plus the youngest is growing cabbage for a fall crop.
 |
| Yellow apples growing on a tree in the side yard. |
One huge surprise for me this year! These apples are growing on a tree in an area of the side yard from an old orchard that was planted in an area that was really to wet for apple trees. Over the years, they have all died out, but somehow, this has survived. I thought last year it was dead, but I looked down in that area a few weeks ago to see this...apples! We have several apple trees up on the top of the hill on the treeline, some very old, some my mom planted 35 years ago, so I guess even those trees are old, but somehow, this tree pollinated! The closest trees are on the other side of the farmhouse, and on top of the hill, the closest being about 100 ft. away! I"m happy, I have a blueberry jam recipe that calls for tart apples to thicken the jam, so I think these will be perfect. Last year, I made several pints of applesauce from the apples up on the hill. It was so delicious, I can't believe I didn't make applesauce years ago! I guess with the kids being younger, and me thinking applesauce was more complicated that it was, it was something I didn't tackle! Fact is, applesauce is one of the easiest things to make and can for the winter! So easy! I have always canned tomatoes, and that does take up a bit of time, but applesauce is so easy, it's no problem fitting that into the schedule.
I mentioned blueberry jam. So many years ago, 35 years ago, maybe more, my mom planted blueberries in the other side yard opposite the apple tree orchard. She planted early, mid season, and late variety blueberries so as to get a longer crop. Well, about eight of those plants are still alive and fruiting! I have gotten a very good blueberry crop this year, have made muffins, coffee cakes, blueberry pancakes, frozen a bunch, and plan to make some blueberry jam with a bunch I picked last week and this week. These plants are in severe need of pruning, I think I will prune half the bush so I still get fruit next year, and then follow with the next half next year. A few of the bushes look terrible, but they have leaf growth, so those I'll probably give a harder pruning. Of the eight plants, five are still fruiting nicely! Not bad for very old bushes!!
My tomatoes are going strong, as well as my Big Max pumpkins have pumpkins forming, my pole beans are starting to take off, I'm planting a fall crop of lettuces, peas, beans, cabbage, Brussels Sprouts, kohlrabi, and flowering cabbage, just to keep things pretty! Mulch is my best friend. Keeping ahead of weeds makes for healthier plants, which makes the plants be able to resist attacks of fungus or bugs. I still fight with slugs and cabbage worms, and as I've said, floating row covers are working great for me. They may not look so great as people glance from the road into my garden, but the end result is getting a nice healthy crop. I don't mind sharing some of my crop with the critters, that's just nature, but they tend to be rude dinner guests and eat everything in sight! Next order of business...teach the critters some manners!! :)
Do you have any gardening questions? I have gardened my entire life, and have found solutions to keep from having to use chemical fixes. Nature takes care of nature. If you are patient and committed, there is always an answer in nature, and often closer than you think!


